Showing posts with label simple recipes. Show all posts

Tuesday, June 7, 2016

Cook With Kids: Mango Cream Parfait


For me, summers spell M-A-N-G-O-E-S and truck loads of them. I make sure to eat my favourite fruit in all its forms. A plate of freshly sliced mangoes after food becomes our dessert. It has been the case since I was little.


I remember my eyes lighting up to see mom bring a plate full of mango and sweet melon slices. At the same moment mom's eyes would signal to finish the meal first if I wanted the fruits. Following in the footsteps of  my mom, I try to bribe my child also into finishing his meal to get his bite of juicy sweet mangoes. It works every time and Little M obliges as his plate is wiped off in minutes without any fuss. :-)


Recently, I had prepared custard and saw a few cake slices lying around so I thought of making my very own Mango Custard Parfait which was a hit with both the boys - Little M and M. Later on Little M also helped me arrange the parfait by layering it with homemade chocolate cake, custard, fresh mango chunks and pomegranate pearls. Creating a parfait is easy and can be done in so many different ways. There are no rules in this game, it only gets better and tastier with more layers and more fruits.


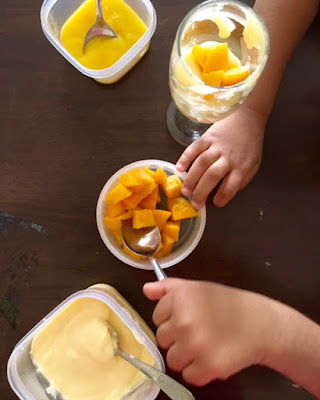
This time, see how Little M and I assemble our glass jars with this yummy Mango Cream. Mango Cream is nothing but mango and cream.


It is so yummy and a great chilled dessert to pamper your family or guests with on hot summer days. Rest assured this one is totally fuss-free and gets ready in under 15 min. Make it at least 3-4 hours before serving as it tastes best once chilled and needs to be chilled in the fridge for at least 2 hours.


See how Little M created his own parfait after I showed him by arranging one glass. You too can make this simple dessert with your children, just make sure to keep the pulp-cream mixture ready and mango chunks chopped before you invite kids into the kitchen.


Serves: 3-4
Ingredients:


2 Mangoes, pulped (or about 1 cup mango pulp)
1 cup Mango, diced
350 ml whipping cream (about 1 and 1/2 cup)
A pinch of cardomom powder
Sugar, as needed


Method:


1) Start by peeling and pulping mangoes in a blender. Keep aside.
2) Chop a mango into little chunks. Keep aside.
3) Taste your mango pulp, if its not sweet, add sugar to whipping cream and blend for 2 min.
4) Blend together half the amount of mango pulp with 3/4th of the whipped cream and cardamom powder. Leave the rest of the cream and pulp to create layers in the glass or if you do not wish to serve as a parfait blend the cream and mango pulp and serve in a bowl. Top it with mango chunks.


5) To make a parfait, take a jar/glass and using a spoon put in the mango chunks and then create layers with mango pulp-cream mix and then create another layer with cream or pulp and top it with mango chunks.
6) Slide the glasses into the refrigerator and serve chilled.


How did you like this fun dessert?

Do you like making something sweet with mangoes in summers just as I do?

Tell me how do you surprise your family by making mango-based desserts?


I'd love to read all your mango stories!

Thanks for reading! :-)

Monday, May 30, 2016

Cook With Kids: Mango Parfait


One of the reasons I love summers is because we get a variety of mangoes in abundance during this season. Come summer and mango would be mentioned in our conversation frequently at home. That bag of season's first mangoes that my mother would get from the neighbourhood fruit and vegetable market was so treasured by my siblings and I.


Whenever heading to the market, mom would always ask to check if there are enough mangoes at home or not and so many times when mom would get 2-3 kgs of mangoes, my father would also come home with the same amount at night. :-) Mangoes would never go out of stock at our home during summer.


Mangoes would be the reason we would love to rush home after school. As we would finish our lunch, mom would ask each one of us whether we want our mango full or to be sliced. My sister, brother and I would each get one whole mango to ourselves and we would hardly like to get it sliced. Eating the dussehri mango would mean biting off the black part on top of the mango to make a small opening and pressing with hands to suck the pulp out of this yummy fruit. We would never let a drop of the juice going down our hands or elbows to fall or go waste and would lick the juice starting from our fingers, hands, down to our elbows, giggling away.

I am of the kinds who do not like anyone tempering with their favourite fruit/recipes and I liked to eat my mango as it is, chilled from the fridge. No other flavoring or mixing for me, please. At most that I would let anyone play with my mango is to make a mango milkshake out of it or some mango ice-cream, made at home. I do not like the taste of store-bought mango ice cream and only enjoy eating a mango cream duet popsicle or an ice mango pop. But last year at my son's nursery when I had gone for a healthy cooking competition to mark Mother's Day, I tasted a mango parfait. I had no idea what a parfait meant, it was like a creamy layered dessert served in a glass, topped with chopped fruits. Tasting it was heavenly and I knew this is one thing I am going to try and learn and make it for my family in summers.


Now there are so many versions of parfait all over the internet that I end up getting confused whether to use yoghurt as a healthy alternate for cream in order to create layers. Many parfaits have a layer of oats and smoothies. Since I had recently made a bowl of fruit custard, I was brimming with ideas to serve the custard (see the above picture) to my family in a new way.


Method:

I made this mango parfait by layering it with a slice of chocolate cake (that I made in a mug in the microwave, see the recipe here), mango fruit custard (Click for the recipe), mango chunks and pulp and pomegranate seeds.

Then I let Little M arrange one of the glass jars by first showing him how to do it and then asking him to repeat the steps one by one. He absolutely loved doing it. You can also involve your kids in arranging the parfait jars with their own choice of ingredients. Just keep everything ready in advance. Chop the fruits, slice chocolate cake and prepare the custard and let your little ones make their own beautiful custard and fruit jars. You will be surprised by their imaginations and ideas as they create their own masterpieces. Why involve kids in the kitchen, you may wonder! Well, see the number of benefits I listed out here!


This is a super simple recipe that I highly recommend everyone to try out. The simplicity of this recipe amazes me and we can do so many variations in creating the layers. For example, you can completely omit the cake and use crushed or broken Marie/digestive biscuits. You may even create a layer using chocolate syrup or chocolate ice cream or use some other fruits such as grapes, apples. One may also garnish with dry fruits and nuts instead of pomegranate. Since this recipe is so versatile I did not feel the need to list out the exact measurements of the ingredients and the steps or method.


Ever since we made it together, my little one keeps on asking me to make it again! Plus, this is another recipe which is no-cook and totally fuss-free and the arranging of the parfait can be done by involving kids too! Now I have a quick dessert recipe for days I and my family are craving for something sweet. This one is surely going to be a saver to please unexpected guests or an impromptu dinner get-together.


Hope you enjoyed reading this sweet recipe as much as I enjoyed making it!

Have you tried making a parfait? What are favourite ingredients to us in a parfait?

Tell me all, I'd love to read what you all think!

Thanks for reading! :-)

Wednesday, April 6, 2016

Dahi Chicken - yoghurt, lemon, dry chicken.


As I write this from my little corner in a room full of crisp sunlight, I am surrounded by silence and look forward to the next few hours to myself. Little M started big school yesterday. It feels great to have a few hours to yourself in which I try to wind up my work, blogging and household chores.

Every homemaker has certain recipes for days when they do not have enough energy or time to get into the business of chopping lots of veggies and preparing a full-fledged meal or a separate tadka or tempering.

This Dahi Chicken or Yoghurt Chicken recipe that I share here today is one of those. I am proud to share this recipe here as the person behind its origin is my papa. :-) I came to know what a master chef my father is when we visited Delhi in November 2012 when I tasted the most juiciest and tender melt in the mouth mutton and the most delicious dry chicken. His mutton kadhai is out of the world and a dish I can never have enough of. See my father's mutton kadhai recipe here!


Being a homemaker who likes to cook every meal myself, I like delicious, nutritious recipes that can be put on the dining table in under 30 minutes. This Dahi Chicken takes only ginger garlic, yoghurt, lemon juice and butter. This is a dry recipe and it can be served as a starter or even scooped with hot and fresh chapattis for a quick meal.

This dahi chicken can beat the tandoori chicken any day, I say!

The leftover chicken pieces (bones removed) were used in the morning to prep up chicken paratha rolls to pack for Little M's school.

The recipe is simple and takes not more than 40 minutes.

Prepping time: 10 min
Cooking time: 20-30 min
Difficulty level: Easy

Ingredients

Chicken 1kg skinless, cut in medium pieces
Yoghurt 1 cup
Chopped ginger, garlic (5-6 tea spoons each)
Slit/Chopped green chillies (3-4)
Butter (about 100gms)
Salt, to taste
Pepper 1 tsp
Lemon juice (3-4 lemons)

Method:


1) In a wok, heat butter. Put chopped ginger and saute.


2) Let it turn golden and then add garlic and green chilies.


3) Saute till the raw smell of garlic disappears and then add the chicken pieces, yoghurt.


4) Keep stirring to avoid it from sticking to the bottom of the wok for about 15 min or till the chicken is tender.


5) Now add salt, lemon juice, pepper. Keep stirring in between. Let it dry completely. Only butter would be left at the bottom.


Sprinkle coriander leaves and serve as a dry starter or as a main meal with hot phulkas or chapatti.


I would highly recommend this recipe. If you try it, do tell me how did you like it.

Thanks for reading! :-)

Monday, March 14, 2016

Pancakes


Now show me someone who doesn't love a warm, mildly sweet and fluffy pancake! Don't we all love pancakes and especially those of us who have a sweet tooth? :-)

This is an American version of pancake, a round and fluffy cake made instantly on a non-stick griddle by spreading a batter made with eggs, flour, sugar, and some raising agent. The British crepe is a slightly thinner version of pancakes.


In India we make pancakes that aren't sweet such as the South India Dosa and Uttapam, the Punjabi besan ka puda. The sweet varieties are malpua and meetha puda. The sweet pancakes in India are mostly sweetened by gud or jaggery whereas the salty or spicy pancakes are made from either rice flour or chickpea flour.


At times when I am running late or not in a mood to chop veggies, these pancakes come to my rescue and wiped off by husband and Little M within minutes. These pancakes are mildly sweet and can be put on the table within 15 minutes. These are excellent to pack for the school or office and the batter can be made the night before and stored in the fridge for finishing up the early morning dabba packing in under 5 minutes.

You can also add fruits like blueberries, bananas by chopping or mashing it into the batter. Many varieties are available on the internet. This recipe that I share here is inspired by this one with a few tweaks here and there.

What more can a mom ask for on a lazy Sunday morning? Sunday is the first working day for us here in the UAE when schools and offices resume after the weekend break. Weekend in the UAE means Friday and Saturday. :-)

Little M loves helping me stirring up the batter and cracking the egg. Of course we have many spills!


Ingredients:


1 1/2 cup all-purpose flour
1 tsp baking powder
1 tsp vanilla essence
1 tbsp sugar
1 1/4 cup milk
1 egg, beaten
3 tbsp butter, melted (optional)
1 tbsp oil

Makes: 8 pancakes
Prepping time: 5-7 min
Cooking time: 5-7 min

Method:


1) Take a large bowl, sift together the flour, baking powder and sugar.


2) Using a kadchi or service spoon make a well in the center.


3) Pour in the milk and then the beaten egg and melted butter. Mix until smooth. There should be no lumps.

4) Heat a lightly oiled non-stick tawa or griddle. Pour the batter on it using a round-deep kadchi or service spoon, using approx. 1/4 cup for each pancake.


5) When you start seeing tiny holes on the upper side being formed turn the pancake on the other side. Brown on both sides. Serve hot and drizzle lots of honey on them for a natural sweet taste.


The teddy-face shape below can be made easily by pouring one kadchi of the batter in the middle and then two spoons on the top on each side for the ears. Use blue berries or grapes to make eyes and surprise your kids with a cute bear-shaped pancake! :-)


The heart and flower shapes were cut out by Little M using cookie cutters


This is how I prepare my plate of pancakes, with fresh fruits from my fridge, accompanied by dry fruits and nuts bathed in honey!


How do you like your pancakes? 

Do you prefer making the Indian pancakes such as Dosa, besan puda or malpua? If yes, the please do share your recipe with me in the comments section!

Do share your thoughts with me on this simple breakfast made yummy in a jiffy. I would love to read what you think. :-)


Thank you so much for reading!

Sunday, March 13, 2016

Aloo Methi sabzi (Fenugreek potato stir-fry)


Aloo Methi sabzi or potato and fenugreek leaves stir fry is another gem from the North Indian cuisine. The aloo-methi has a lot of flavour with the bitterness of methi and softness and sweetness of potatoes. This is the reason why this Punjabi dish is cooked with minimal ingredients. Only a handful of goodies go into this rich, aromatic yet humble dish

I have grown up seeing my mother make most of the sabzi(s) (stir fry veggies) in the mustard oil just like my late grand mother. Which made me wonder why mustard oil for veggies? When I started cooking and sometimes used to make sabzi in normal cooking oil I could feel the difference. The taste of mustard would be missing and the stir fry vegetables would seem flavorless.

Cooking in slightly burnt mustard oil adds its own pungent bitterness to a stir fry and makes the dish all the more flavorful with its taste of mustard.


Methi or fenugreek has its own bitter dense fragrance. It is one of my favourite food fragrance and I can tell any dish only by smelling at it that it has got sookhi methi or kasoori methi (or dry fenugreek leaves roasted and crushed).

This green vegetable is packed with nutrition and is a rich source of iron, folic acid and fiber. It is available in Delhi in the winter season.

Taking a stroll down my parents' home I can smell the fragrance of methi being prepared for breakfast as methi parathas (See my mother-in-law's methi paratha recipe here) or as a veg stir fry or being added to curry or daal to lend it a bitter, aromatic and roasted flavour.

Here is the complete recipe to make this super quick and simple dish that evokes the memory of a cold winter morning from my childhood, just how my mother makes it!

Ingredients:


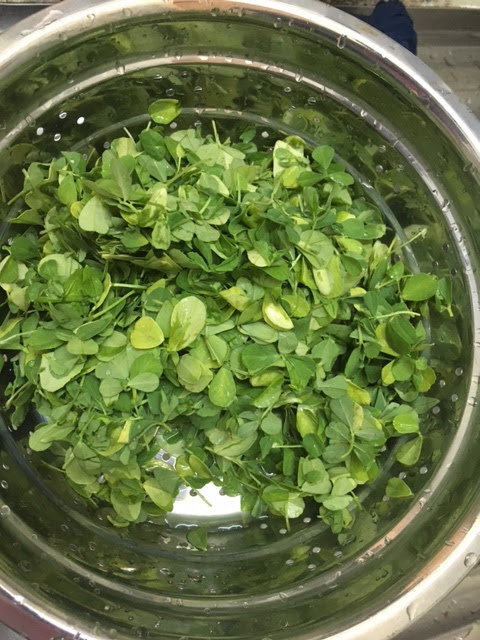
Methi leaves 3-4 cups, plucked, washed and chopped
3-4 medium-sized potatoes, cubed
2 medium-sized tomatoes, finely chopped
3-4 tbsp mustard oil
2-3 green chilies, chopped
1 tsp coriander powder
1 tsp red chili powder
salt, to taste

Cooking time: 30min
Preparation time: 15min
Serves: 4

Method:

1) Take a big wok and pour in 2-3 tbsps of mustard oil. Let it burn a little and then turn of the gas.


2) Carefully put finely chopped tomatoes and green chili into it. Turn on the gas and saute it on medium flame.


3) When the tomatoes seem to have got a paste-like consistency, you will notice the oil has separated from it. At this stage add in salt, red chili powder and coriander powder. Stir.


 4) Time for the cubed potatoes to go in. Mix well with the tadka. On low flame, cover for 3-4 min for the potatoes to soften, stir in between to avoid potatoes from burning.


5) Now add in the methi leaves! Stir well and cover for 5-10 min, stirring every now and then.


Aloo-methi sabzi is ready!


Serve hot fresh chapattis or paratha!


How do you like to cook your methi sabzi? What are the other ways you use these wonderful fenugreek leaves? In making puri, paratha or mathri? Or do you love adding kasoori methi to your daal makhni and soups?

Please do share your thoughts about this recipe with me.


Thanks for reading! :-)

Tuesday, March 8, 2016

Pudina Chutney or Mint-Coriander Dip


Pudina Chutney or Mint-Coriander Dip is a way of life for people like me who love everything spicy! All the street food in India, specially in Delhi is bathed and served with generous amounts of this spicy and tangy mint dip.

We, Punjabis don't think about pakodas (Indian fritters) without this chutney. It is a must with pakodas!


The fragrance of mint leaves is another favourite herb fragrance of mine along with the fragrance of green ilaichi or green cardomom, tulsi or basil and dhaniya or coriander leaves.

The fresh mint chutney, made by my late grandmother by grinding mint and coriander leaves along with green chilies and raw mango with a mortar and pestle, tempts my taste buds.


Back then there were no food processors or blenders. The version that my granny made using mortar and pestle and her arm power, used to have such a nice and bright hue of green and as soon as she would start grinding the leaves, the fragrance of mint would come wafting from the kitchen.

I have a yummy sour and tangy taste in my mouth as I am writing about this nostalgic fragrance of pudina chutney made by my granny.


This dip can be made with a number of variations and ingredients like ginger-garlic can also be added. I have used the same ingredients that my granny used and my mother uses:

2 cups mint leaves
1 cup coriander leaves
5-6 green chilies
1 raw mango
1 amla or Indian gooseberry
1 medium sized onion
Salt to taste


I grind it using my hand blender, adding 2-3 spoons of water when needed.


And its done! Super simple. Store it in an air-tight jar or container for about a week in the fridge.


Eat it with your daal-chawal (rice and lentil), chapatti and sabzi (vegetable) combo or gorge on some pakodas with this spicy dip, or line your sandwiches with it for that perfect tangy taste.

You can even mix in two spoons of yoghurt in it to make a dip to go along with the biryani or bread pakodas (batter fried bread fritters).

This pudina chutney makes any dish tangy and flavourful!

How do you make your dips?
Do you like your dips to be spicy or creamy?

Do share with me your mint and coriander tales! I would love to read them. Thanks for reading! :-)